Overview
This article provides a step-by-step process to install Connect for Microsoft System Center.
Process
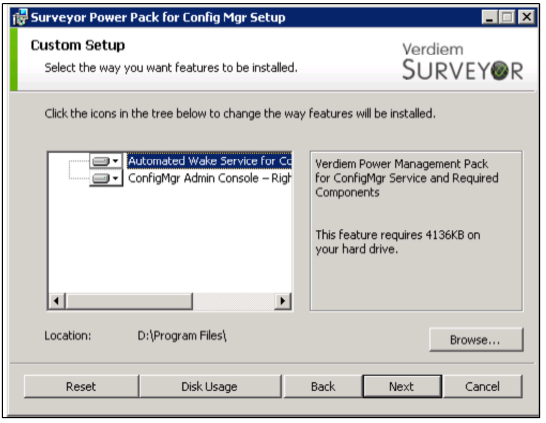
- Select a feature to Install.
- Log in to the SCCM (System Center Configuration Manager) Site Server Machine as Administrator (who has complete privileges on the machine).
- Run the setup file, PowerPackInstaller, proceed and accept the End User License Agreement, then click Next.
- Install the plugin/plugin services.
- If you want to install only the plugin Services select Automated Wake Service for ConfigMgr.
- If you want only the plugin, choose ConfigMgr Admin Console > right-click Context Menu Addon.
- Select these options based on your SCCM setup and requirement, then click Next.
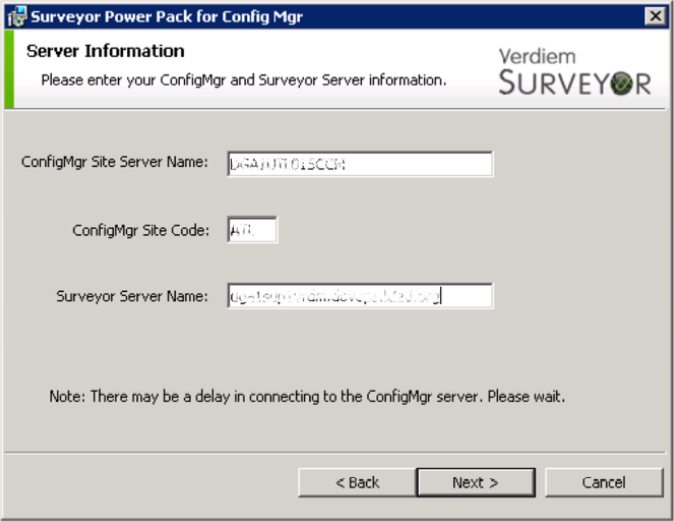
- Enter your ConfigMgr and Surveyor server information.
- ConfigMgr Site Server Name: Enter the Site server name onto which the Surveyor services and add-on needs to be installed.
- ConfigMgr Site Code: Enter the corresponding site code of the site server entered.
- Surveyor Server Name: Enter the Surveyor server name.
- Once all required information is entered, click Next.
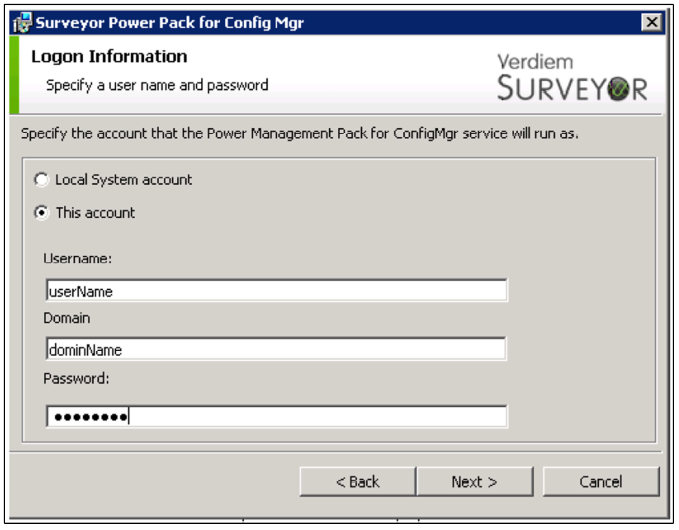
- Specify the user name and password, and click Next. You could either choose:
- Local System Account: This will choose the current logged in user of the machine to run the service.
- This account: You can explicitly specify the service user, which will be used to run the service irrespective of the user who is logged in.
Note: The user selected to run the service has permission to interact with Surveyor Server and also has privileges to the DB of the Surveyor Server.
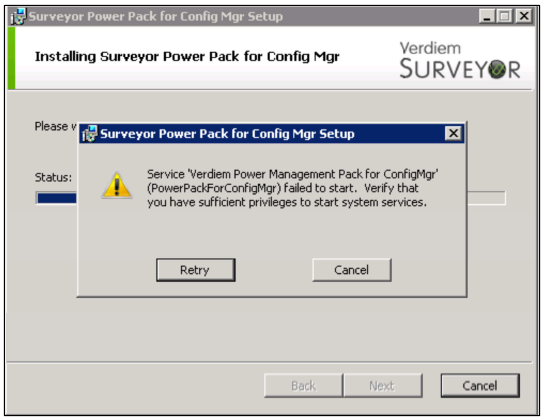
- If invalid login details are provided, the installation process will fail with an exception as below:
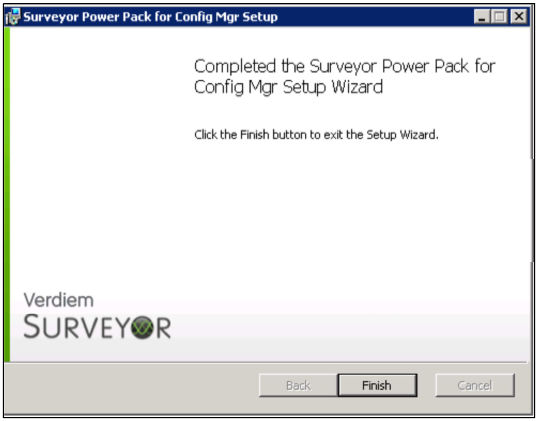
- You can confirm the setup by Clicking Finish.
Validating the Setup and Configuration
Files deployed
- Under the installed directory, C:\Program Files (x86)\Verdiem\Power Management Pack for ConfigMgr, the following file structure is expected to appear:
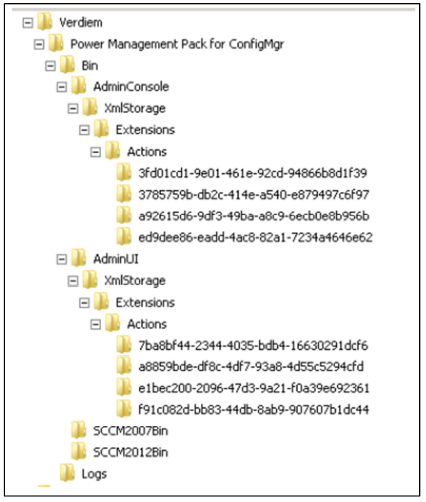
- You can find the log files under the installed location for the services and Admin Console.
- And the PMP processor log can be found under %appdata%\Verdiem\Logs.
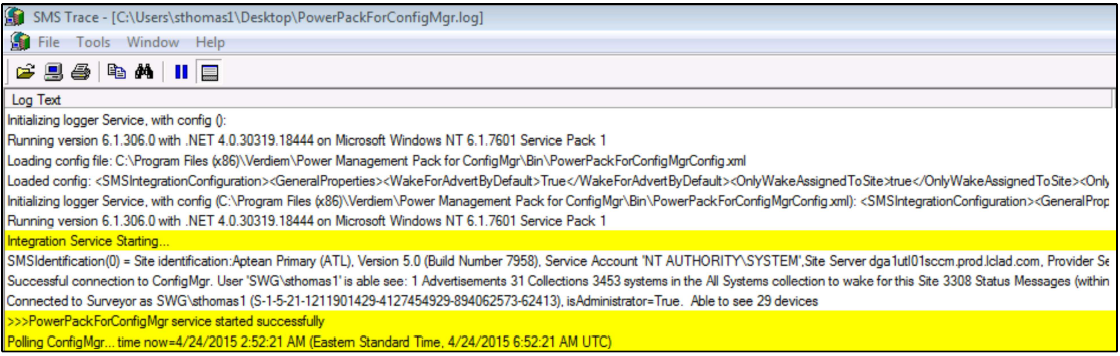
Verifying logs for connectivity
To check the logs navigate to (Install path)\Verdiem\Power Management Pack for ConfigMgr\Logs\
The image below is a screenshot showing what a successful configuration looks like:
Power Pack Test
To check the connectivity of Power Management Pack for SCCM, we can follow these instructions:
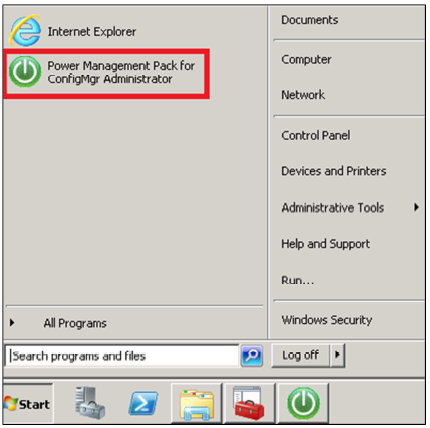
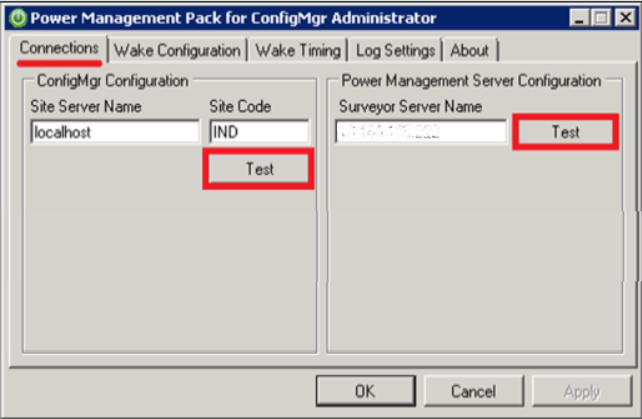
- Go to Start and search and click on Power Management Pack for ConfigMgr Administrator.
- In the opened Console select the Connections tab.
- In the connection tab, there will be two sections named ConfigMgr Configuration and Power Management Server Configuration.
- The ConfigMgr Configuration will show the current Site Server Name and the Site Code. To test the scenarios, press the Test button.
- The Power Management server will show the connection of the Surveyor Server Name. To test the configurations, press the Test button too.
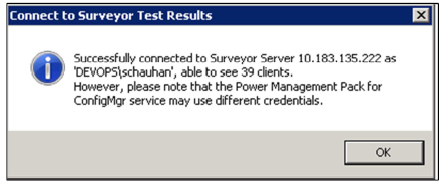
- If the tests are successful, the following window will pop up:
Confirming Server Connections upon Startup
The Power Management Pack service starts automatically upon system startup, and you can use the Windows Services Management Console to stop and start it. When the service starts, connections are established to both the power management server and the Configuration Manager Site server. If either the Surveyor server or Configuration Manager Site server is unavailable, the Power Management Pack service will start, but it might fail to connect. To confirm that the connections were made successfully, view the most recent log file, PowerPackForConfigMgr.log which is created in the location specified on the Log Settings tab of the Power Management Pack Administrator console.
Test Status Message Logging
To confirm that status messages are being logged properly, send a test message, and then you view it from the Configuration Manager console.
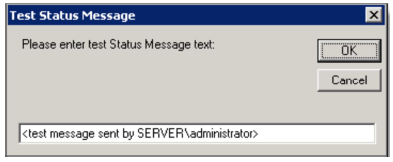
- Send a test status message.
- On the Log Settings tab, click Send Test Message.
- In Test Status Message dialog box, type a sample message text and click OK.
- View status messages.
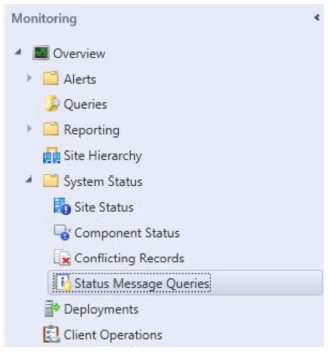
- In the Configuration Manager console, navigate to Monitor > System Status and select Status Message Queries.
- In the list of queries that appears, right-click All Status Messages and choose Show Messages.
- In the All Status Messages dialog box, specify the time period you are interested in and click OK.
- In the Configuration Manager console, navigate to Monitor > System Status and select Status Message Queries.
The Component column indicates where a message originated.
Test Power State Changes in the Console Extension
You use the Configuration Manager console extension to perform power state changes from the Configuration Manager console.
- In the Configuration Manager console, select any view that shows the devices you want to manage.
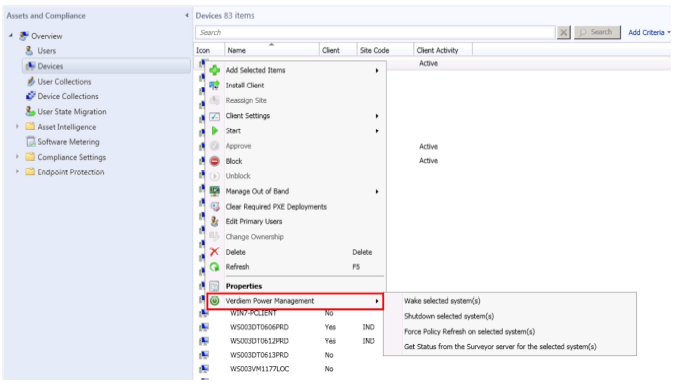
- Right-click a device on which you can test power state changes, and then do one of the following:
- To test shutting down the computer, choose Verdiem Power Management / Shutdown selected system(s).
- To test waking the computer, choose Verdiem Power Management / Wake selected system(s).
Priyanka Bhotika
Comments